Mở đầu
Chắc hẳn, chúng ta đã quá quen với việc xác thực và phân quyền trong dự án. Vừa rồi mình có thấy 1 cách phân quyền khá hay dựa trên nền tảng của gem Cancancan, phân quyền dựa trên chính các action của controller. Đó là ứng dụng gem role_core kết hợp với cancancan để phân quyền, sau đây là một vài chia sẻ.
Xây dựng hệ thống
Khởi tạo dự án và các thứ cần thiết
Chúng ta cần 1 dự án để demo, mình dùng tạm dự án của các bài viết trước
git clone [email protected]:loctx-2273/upload-file-with-carrierwave.git
Seed data
cd upload-file-with-carrierwave/ rails db:migrate:reset; rails db:seed
Coding
Chúng ta cần 1 table users để chứa thông tin người dùng, 1 table roles để chứa thông tin permission cho từng role mình định nghĩa
- Config vài thứ:
Add gem -> bundle
gem "cancancan"
gem "role_core"
Run lệnh sau để thực hiện create table roles theo format của gem role_core
bin/rails role_core:install:migrations; bin/rails db:migrate
Config, thực tế là nơi để định nghĩa permission cho từng role :v
bin/rails g role_core:config
Create model Role
bin/rails g role_core:model
Thêm field cho user
rails g migration add_role_id_field_to_user role_id:integer
Relation cho model User, Role và vài thứ liên quan
class Role < RoleCore::Role
  ROLES = %w(admin user).freeze

  has_many :users
  validates :name, inclusion: {in: ROLES}
end

class User < ApplicationRecord
  belongs_to :role

  mount_uploader :avatar, AvatarUploader

  delegate :permissions, to: :role
  delegate :computed_permissions, to: :role

  def admin?
    role.name == "admin"
  end

  def user?
    role.name == "user"
  end
end
Migrate db
rails db:migrate
Create model Ability cancancan
rails g cancan:ability
- Định nghĩa permission
Khởi chạy Ability mỗi lần gọi vào controller, có thể định nghĩa trong ApplicationController
before_action :current_user, :current_ability
def current_user
    # Coi như là đang login với User.first =))
    @current_user ||= User.first
end

def current_ability
    @current_ability ||= Ability.new(current_user)
end
Thay vì chúng ta định nghĩa cho từng Model trong ability thì bây giờ chúng ta sử dụng định nghĩa của role_core để phân quyền
class Ability
  include CanCan::Ability

  def initialize(user)
    user.computed_permissions.call self, user
  end
end
Thêm delegate trong model User để gọi trực tiếp lun
  delegate :permissions, to: :role
  delegate :computed_permissions, to: :role
Định nghĩa permission trong role_core.rb
Định nghĩa lại tên của action index là list_user, nằm trong group admin
group :admin, subject: :user_controller do
    permission :list_user, action: :index
end
Sau khi thêm định nghĩa, chúng ta thử kiểm tra data
[1] pry(main)> User.first.role
=> #<Role:0x0000000004cfe0a0
 id: 1,
 name: "admin",
 permissions: #<Global:OptionsModel {:admin=>{:list_user=>false}}>,
 type: "Role",
 created_at: Sun, 19 Sep 2021 04:45:52.098620000 UTC +00:00,
 updated_at: Sun, 19 Sep 2021 04:45:52.098620000 UTC +00:00>
permissions của user đã được thiết lập nhưng theo data hiện tại hiện chưa cho phép user này với action list_user trong group admin. Chúng ta update được permission này tại role admin true thì user sẽ có quyền vào action tương ứng.
[6] pry(main)> permissions = {:admin=>{:list_user=>true}}
[7] pry(main)> User.first.role.update permissions_attributes: permissions
[8] pry(main)> User.first.permissions
=> #<Global:OptionsModel {:admin=>{:list_user=>true}}>
[9] pry(main)> User.last.permissions
=> #<Global:OptionsModel {:admin=>{:list_user=>false}}>
Tại users_controller,
def index
  authorize! :index, :user_controller

  render json: {status: :ok, message: "Get list users successful", data: User.all}, status: :ok
rescue CanCan::AccessDenied
    render json: {status: :bad_request, message: "No permission"}, status: :bad_request
end
Nếu không có quyền chúng ta sẽ handle lỗi khi error này được raise CanCan::AccessDenied
Chỉ như vậy, chúng ta đã định nghĩa phân quyền được cho user.
Chạy thử
Sau khi hoàn thành được cách để thực hiện phân quyền thì chúng ta chạy lên xem nó dư lào
Kiểm tra thông tin permissions cho từng user chạy thử
[1] pry(main)> User.first.permissions
=> #<Global:OptionsModel {:admin=>{:list_user=>true, :send_sms_verification=>false, :update_phone_number=>false, :update_avatar=>false}}>
[2] pry(main)> User.last.permissions
=> #<Global:OptionsModel {:admin=>{:list_user=>false, :send_sms_verification=>false, :update_phone_number=>false, :update_avatar=>false}}>
-
Với current user với role là admin khi thực hiện get list users
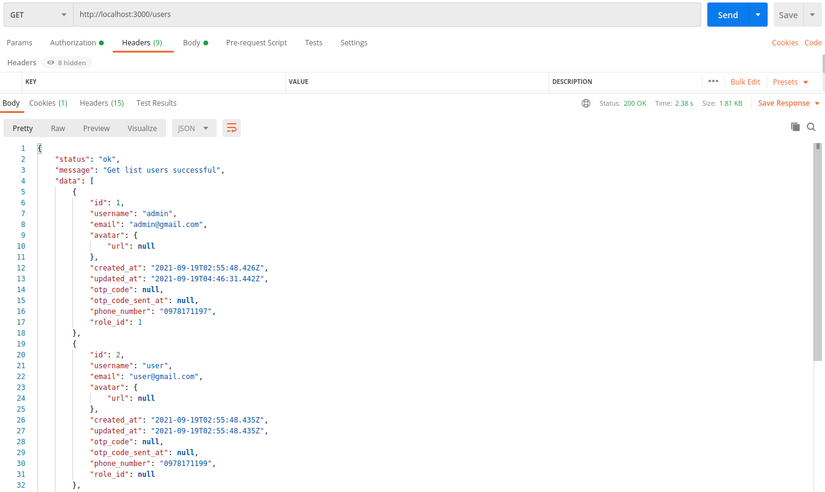
-
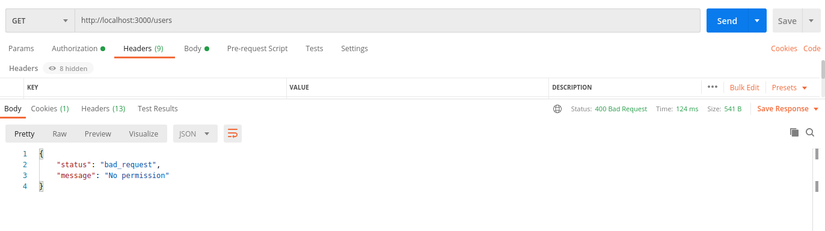
Với current user với role là user khi thực hiện get list users

Uy tín nuôn =))
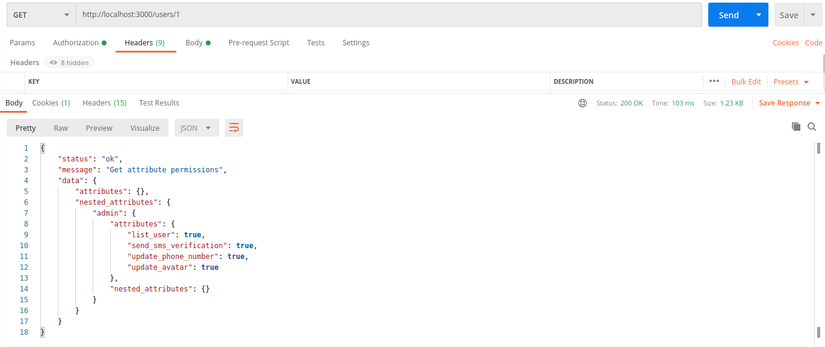
Chúng ta có thể get list permissions theo role để chỉnh sửa permissions cho từng role thao tác với UI cũng ngon lành
def show
    authorize! :index, :user_controller

    render json: {status: :ok, message: "Get attribute permissions", data: current_user.permissions.as_json}, status: :ok
end
Hoặc viết 1 rake task để cập nhật permissions cũng oke, ví dụ như:
File: update_role_permissions.rake

namespace :update_role_permissions do
  desc "Update role permissions"
  task run: :environment do
    puts "== Begin =="
    Role::UpdateRolePermissionsAdmin.execute
    puts "== Done! =="
  end
end

Lib: update_role_permissions_admin.rb
class Role::UpdateRolePermissionsAdmin
  def self.execute
    user = Role.find_or_initialize_by name: "admin"
    user.update(
      permissions_attributes: {
        admin: {
          list_user: true,
          send_sms_verification: true,
          update_phone_number: true,
          update_avatar: true
        }
      }
    )
  end
end
RUN rake update_role_permissions:run
Kết
Source đã demo trong bài viết: Link github
Trên đây là cách mà mình áp dụng để phân quyền hệ thống theo từng action của controller, bản thân mình thấy cách này khá hay và muốn chia sẻ những trải nghiệm của mình. Và, trong quá trình viết sẽ không tránh khỏi những thiếu sót về hình thức cũng như nội dung, mong bạn đọc góp ý để mình hoàn thiện hơn cho bạn đọc sau.
Cám ơn đã dành thời gian đọc bài chia sẻ của mình 👾👾👾
Nguồn: viblo.asia