Hi mọi người.
Bài viết này mình sẽ chia sẻ cách upload mutiple file images trong laravel 8. Ở ví dụ mình demo sẽ bao gồm các chức năng như create, edit file images.
Các bạn hãy theo dõi các bước bên dưới để hiểu hơn nhé.
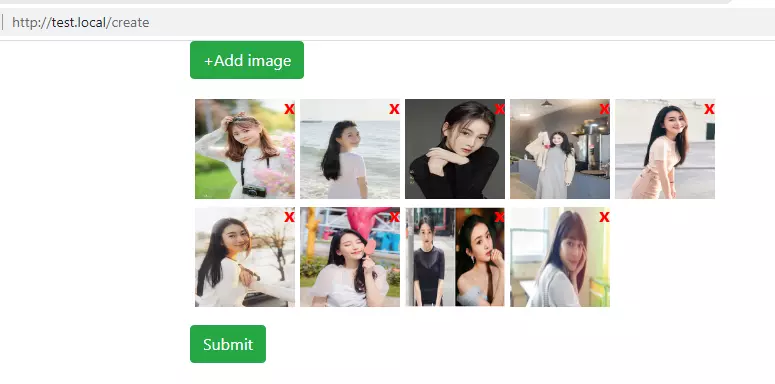
Màn hình Preview create.
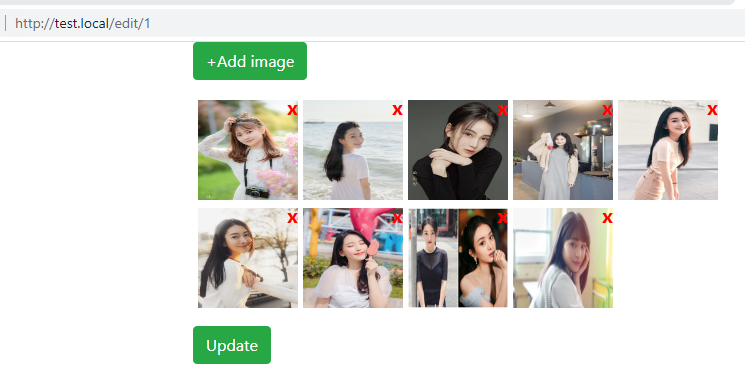
Màn hình Preview edit.
Step1: Tạo Migration và Model
Mình sẽ tạo migration và model cho table files như bên dưới nhé
php artisan make:migration create_files_table
Migration:
<?phpuseIlluminateDatabaseMigrationsMigration;useIlluminateDatabaseSchemaBlueprint;useIlluminateSupportFacadesSchema;classCreateFilesTableextendsMigration{/**
     * Run the migrations.
     *
     * @return void
     */publicfunctionup(){Schema::create('files',function(Blueprint$table){$table->id();$table->string('filenames');$table->timestamps();});}/**
     * Reverse the migrations.
     *
     * @return void
     */publicfunctiondown(){Schema::dropIfExists('files');}}
php artisan migrate
Tiếp theo mình sẽ tạo model file bằng command bên dưới.
php artisan make:model File
app/Models/File.php
<?phpnamespaceAppModels;useIlluminateDatabaseEloquentFactoriesHasFactory;useIlluminateDatabaseEloquentModel;classFileextendsModel{useHasFactory;protected$fillable=['filenames'];/**
     * Set the user's first name.
     *
     * @param  string  $value
     * @return void
     */publicfunctionsetFilenamesAttribute($value){$this->attributes['filenames']=json_encode($value);}}
Step2: Create Routes
Mình sẽ tạo 4 routes như bên dưới để demo chức năng upload, edit ảnh nhé.
<?phpuseIlluminateSupportFacadesRoute;/*
|--------------------------------------------------------------------------
| Web Routes
|--------------------------------------------------------------------------
|
| Here is where you can register web routes for your application. These
| routes are loaded by the RouteServiceProvider within a group which
| contains the "web" middleware group. Now create something great!
|
*/Route::get('create/','[email protected]');Route::post('create/','[email protected]');Route::get('edit/{id}','[email protected]')->name('file.edit');Route::post('edit/','[email protected]');
Step3: Create Controller
app/Http/Controllers/FileController.php
<?phpnamespaceAppHttpControllers;useIlluminateHttpRequest;useAppModelsFile;useIlluminateSupportFacadesFileas File2;classFileControllerextendsController{/**
     * Show the application dashboard.
     *
     * @return IlluminateHttpResponse
     */publicfunctioncreate(){$files=File::all();returnview('create',['files'=>$files]);}/**
     * Show the application dashboard.
     *
     * @return IlluminateHttpResponse
     */publicfunctionstore(Request$request){$this->validate($request,['filenames'=>'required','filenames.*'=>'required']);$files=[];if($request->hasfile('filenames')){foreach($request->file('filenames')as$file){$name=time().rand(1,100).'.'.$file->extension();$file->move(public_path('files'),$name);$files[]=$name;}}$file=newFile();$file->filenames=$files;$file->save();returnback()->with('success','Data Your files has been successfully added');}/**
     * Show the application dashboard.
     *
     * @return IlluminateHttpResponse
     */publicfunctionedit($id){$files=File::find($id);returnview('create',['list_images'=>$files->filenames,'id'=>$id]);}/**
     * Show the application dashboard.
     *
     * @return IlluminateHttpResponse
     */publicfunctionupdate(Request$request){$input=$request->all();$files=[];$files_remove=[];if($request->hasfile('filenames')){foreach($request->file('filenames')as$file){$name=time().rand(1,100).'.'.$file->extension();$file->move(public_path('files'),$name);$files[]=$name;}}if(isset($input['images_uploaded'])){$files_remove=array_diff(json_decode($input['images_uploaded_origin']),$input['images_uploaded']);$files=array_merge($input['images_uploaded'],$files);}else{$files_remove=json_decode($input['images_uploaded_origin']);}$file=File::find($input['id']);$file->filenames=$files;if($file->update()){foreach($files_removeas$file_name){File2::delete(public_path("files/".$file_name));}}returnback()->with('success','Data Your files has been successfully updated');}}
Tham khảo 3 cách lưu ảnh vào thư mục nhé.
Store File in Storage Folder
$file->storeAs('files', $imageName);

// storage/app/files/file.png
Store File in Public Folder
$file->move(public_path('files'), $imageName);

// public/files/file.png
Store File in S3
$file->storeAs('files', $imageName, 's3');
Step4: Create Blade File
Bước này mình sẽ tạo file create.blade.php trong resources nhé.
resources/views/create.blade.php
<html lang="en"><head><title>Multiple File Images Upload</title><link rel="stylesheet" href="https://maxcdn.bootstrapcdn.com/bootstrap/4.0.0/css/bootstrap.min.css"><script src="https://cdnjs.cloudflare.com/ajax/libs/jquery/3.5.1/jquery.min.js"></script><style>.list-images {
        width:50%;
        margin-top:20px;
        display: inline-block;}.hidden { display: none;}.box-image {
        width:100px;
        height:108px;
        position: relative;float: left;
        margin-left:5px;}.box-image img {
        width:100px;
        height:100px;}.wrap-btn-delete {
        position: absolute;
        top:-8px;
        right:0;
        height:2px;
        font-size:20px;
        font-weight: bold;
        color: red;}.btn-delete-image {
        cursor: pointer;}.table {
        width:15%;}</style></head><body><div class="container lst">

@if(count($errors)>0)<div class="alert alert-danger"><strong>Sorry!</strong> There were more problems with your HTML input.<br><br><ul>
      @foreach($errors->all()as$error)<li>{{$error}}</li>
      @endforeach</ul></div>
@endif

@if(session('success'))<div class="alert alert-success">{{session('success')}}</div>
@endif
@if(isset($list_images))<form method="post" action="{{url('edit')}}" enctype="multipart/form-data">
@else<form method="post" action="{{url('create')}}" enctype="multipart/form-data">
    @endif
        @csrf
        <div class="input-group hdtuto control-group lst increment"><div class="list-input-hidden-upload"><input type="file" name="filenames[]" id="file_upload"class="myfrm form-control hidden"></div><div class="input-group-btn"><button class="btn btn-success btn-add-image" type="button"><i class="fldemo glyphicon glyphicon-plus"></i>+Add image</button></div></div><div class="list-images">
            @if(isset($list_images)&&!empty($list_images))
                @foreach(json_decode($list_images)as$key=>$img)<div class="box-image"><input type="hidden" name="images_uploaded[]" value="{{ $img }}" id="img-{{ $key }}"><img src="{{ asset('files/'.$img) }}"class="picture-box"><div class="wrap-btn-delete"><span data-id="img-{{ $key }}"class="btn-delete-image">x</span></div></div>
                @endforeach<input type="hidden" name="images_uploaded_origin" value="{{ $list_images }}"><input type="hidden" name="id" value="{{ $id }}">
            @endif</div><div class="button-submit"><button type="submit"class="btn btn-success" style="margin-top:10px">
                @if(isset($list_images))
                    Update
                @else
                    Submit
                @endif</button></div></form>
    @if(isset($files)&&$files->count()>0)<table class="table table-bordered"><thead><tr><th scope="col">#</th><th scope="col">Edit</th></tr></thead><tbody>
            @foreach($filesas$elm)<tr><th scope="row">{{$elm->id}}</th><td><a href="{{ route('file.edit',['id' => $elm->id]) }}"><button type="button"class="btn btn-info">Edit</button></a></td></tr>

            @endforeach</tbody></table>
    @endif</div><script type="text/javascript">
    $(document).ready(function(){
    $(".btn-add-image").click(function(){
        $('#file_upload').trigger('click');});

    $('.list-input-hidden-upload').on('change','#file_upload',function(event){
        let today =newDate();
        let time = today.getTime();
        let image = event.target.files[0];
        let file_name = event.target.files[0].name;
        let box_image = $('<div class="box-image"></div>');
        box_image.append('<img src="'+URL.createObjectURL(image)+'" class="picture-box">');
        box_image.append('<div class="wrap-btn-delete"><span data-id='+time+' class="btn-delete-image">x</span></div>');
        $(".list-images").append(box_image);

        $(this).removeAttr('id');
        $(this).attr('id', time);
        let input_type_file ='<input type="file" name="filenames[]" id="file_upload" class="myfrm form-control hidden">';
        $('.list-input-hidden-upload').append(input_type_file);});

    $(".list-images").on('click','.btn-delete-image',function(){
        let id = $(this).data('id');
        $('#'+id).remove();
        $(this).parents('.box-image').remove();});});</script></body></html>
Cuối cùng là chạy và kiểm tra code đã hoạt động hay chưa .
Mọi người có góp ý hoặc chưa hiểu thì hãy comment bên dưới nhé.
Hy vọng bài viết này có ích cho các bạn!
Nguồn: viblo.asia