Sau khi tốn cả buổi chiều để fix lỗi thì ngay sau đó mình đã quyết định phải viết ngay bài này để note lại, về sau có gì còn xem lại 😂😂 .
Bài viết sẽ gồm 2 phần, nội dung phần 1 là về chức năng gửi email với tên miền ngẫu nhiên và kiểm tra danh sách thư đã gửi bằng gem mailcatcher.
Phần 2 sẽ viết về cách gửi Gmail (tên miền là @gmail.com ấy).
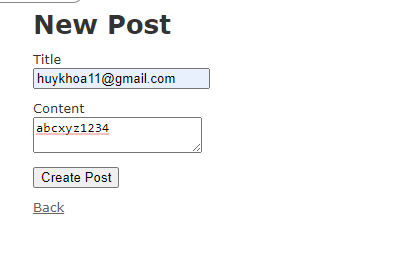
Chúng ta sẽ tạo 1 app Rails có chức năng create Post, sau mỗi lần Post được create thành công thì sẽ email sẽ được gửi đi.
Let’s Start
Part 1: Gửi email với tên miền ngẫu nhiên
1. Tạo model post
Tạo app Rails mới có tên testapp
rails new testapp
Đợi chạy xong thì direct đến địa chỉ app vừa tạo
cd testapp
Tạo model post bằng scaffold
rails g scaffold post email:string content:text
Sau đó, chạy lệnh migrate để tạo database
rails db:migrate
2. Tạo Mailer
Trong Rails, ActionMailer được sử dụng để nhận và gửi mail. ActionMailer khá giống với Controller. Controller dùng Template để hiển trị ra màn hình, ActionMailer cũng dùng Template để tạo và gửi mail.
Tạo ActionMailer có tên PostMailer :
rails g PostMailer creation_email

Bằng câu lệnh trên, cùng với ActionMailer PostMailer, 2 file creation_email.html.erb và creation_email.text.erb cũng được tạo. 2 file này sẽ tạo Template để hiển thị nội dung mail được gửi.
Bên trong file testapp/mailers/post_mailer.rb sửa hàm creation_email như sau:
classPostMailer<ApplicationMailerdefcreation_email(post)@post= post

    mail to: post.email, subject:"Hello World", from:"[email protected]"endend
Hàm creaton_email sẽ nhận @post từ form như 1 parameter.
Mail có subject là "Hello World", sau khi được tạo sẽ gửi đến địa chỉ chúng ta viết trong :email, và tên người gửi là "[email protected]".
Ngoài ra, nếu các bạn muốn thống nhất địa chỉ người gửi, bất kể mail nào đều có chung 1 địa chỉ người gửi thì chúng ta có thể chỉ định giá trị default trong file testapp/mailers/post_mailer.rb như sau:
classPostMailer<ApplicationMailer
    default from: 'test@example.com

  defcreation_email(post)@post= post
....
3. Tạo Template
Ở đây chúng ta sẽ sửa file creation_email.html.erb và creation_email.text.erb để tạo Template hiển thị nội dung mail. Mọi người có thể sửa theo ý thích còn mình sẽ sửa như dưới đây 😂😂:
creation_email.html.erb
<h1>Post#creation_email</h1>
<p>find me in app/views/post_mailer/creation_email.html.erb</p>

<p><%= @post.content %></p>
creation_email.text.erb
Post#creation_email
find me in app/views/post_mailer/creation_email.text.erb

<%= @post.content %>
4. Chức năng gửi mail
Như ở đầu mình nói, app này sẽ có chức năng gửi mail đến người nhận mỗi khi post mới được create. Do đó, chúng ta sẽ gọi ActionMailer từ hàm create trong Controller và gửi mail sau khi save thành công @post. Thêm PostMailer.creation_email(@post).deliver_now vào hàm create:
testapp/app/controllers/posts_controller.rb
defcreate@post=Post.new(post_params)

    respond_to do|format|if@post.save
        PostMailer.creation_email(@post).deliver_now    #thêm vào dòng này
        format.html { redirect_to post_url(@post), notice:"Post was successfully created."}
        format.json { render :show, status::created, location:@post}else
        format.html { render :new, status::unprocessable_entity}
        format.json { render json:@post.errors, status::unprocessable_entity}endendend
Dùng hàm deliver_now thì mail sẽ được gửi ngay lập tức. Ngoài ra còn có hàm deliver_later. Ví dụ nếu viết như dưới đây, 5p sau khi post mới được save, mail sẽ được gửi đi.
PostMailer.creation_email(@post).deliver_later(wait: 5.minutes)
5. Xem mail đã gửi
Chúng ta dùng gem mailcatcher để xác nhận các mail đã được gửi. Đầu tiên, ta sẽ install gem mailcatcher bằng terminal:
gem install mailcatcher
Vì mailcatcher sử dụng server SMTP nên cần phải thay đổi cài đặt trong môi trường development. Thêm vào file config/environments/development.rb như dưới đây.
... # giản lược
# Don't care if the mailer can't send.
  config.action_mailer.raise_delivery_errors = false
  config.action_mailer.delivery_method = :smtp
  config.action_mailer.smtp_settings = {
     address: '127.0.0.1',
     port: 1025
}
... # giản lược
Nếu server rails đang chạy thì các bạn hãy khởi động lại server nhé.
Trước khi tạo post mới, nhập vào terminal dòng dưới đây để khởi động mailcatcher:
mailcatcher
![]()
6. Hoàn thành
Sau khi khởi động mailcatcher, cùng thử tạo post mới và xem kết quả nào !

Trong terminal sẽ hiển thị thông báo gửi mail thành công
![]()
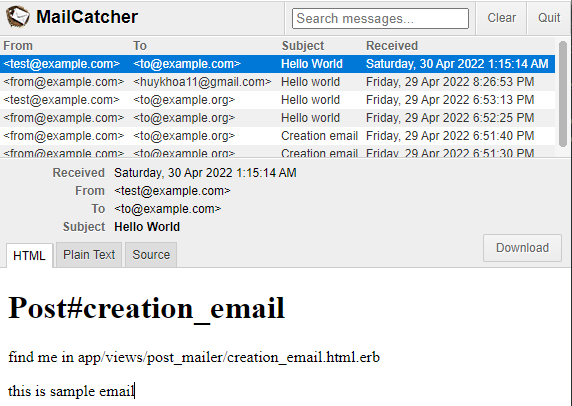
Truy cập vào cổng 1080: http://localhost:1080/ để xem kết quả nha ^^.
File HTML

Yes, It’s works! 😊😊
Vậy là chúng ta đã gửi mail thành công. Giờ có thể thoát mailcatcher bằng nút Quit ở góc phải màn hình.
Part 2: Gửi thư Gmail
1. Thay đổi cài đặt trong môi trường development
Ở Part 1 chúng ta đã xây dựng được chức năng gửi mail. Để có thể gửi thư qua Gmail thì chỉ cần thay đổi một chút ở file config/environments/development.rb.
Xóa đoạn code đã thêm ở development.rb rồi thêm đoạn code dưới đây
  config.action_mailer.default_url_options ={host:"localhost:3000"}
  config.action_mailer.perform_deliveries =true
  config.action_mailer.delivery_method =:smtp
  config.action_mailer.smtp_settings ={
      enable_starttls_auto:true,
      address:"smtp.gmail.com",
      port:587,:domain=>'smtp.gmail.com',
      user_name:'[email protected]',# Tên tài khoản gmail mà các bạn tạo mật khẩu ứng dụng
      password:'****************',# Mật khẩu ứng dụng
authentication::plain}- user_name: Tên tài khoản gmail mà các bạn tạo
mật khẩu ứng dụng. - password:
mật khẩu ứng dụngcủa bạn.
Mật khẩu ứng dụng là mật mã gồm 16 chữ số cho phép một ứng dụng hoặc thiết bị kém an toàn truy cập vào Tài khoản Google của bạn. Chỉ những tài khoản đã bật tính năng Xác minh 2 bước mới có thể sử dụng Mật khẩu ứng dụng.
Chú ý cần bật Xác minh 2 bước cho tài khoản Gmail.
Nếu các bạn chưa biết mật khẩu ứng dụng là gì và cách tạo mật khẩu ứng dụng ra sao thì có thể đọc thêm ở đây .
https://support.google.com/accounts/answer/185833?hl=vi
Hoàn thành
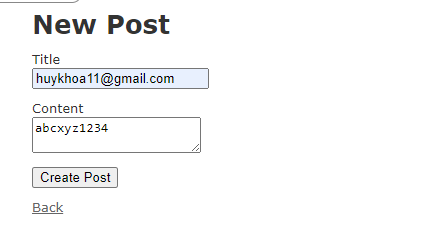
cùng thử tạo post mới nhé!

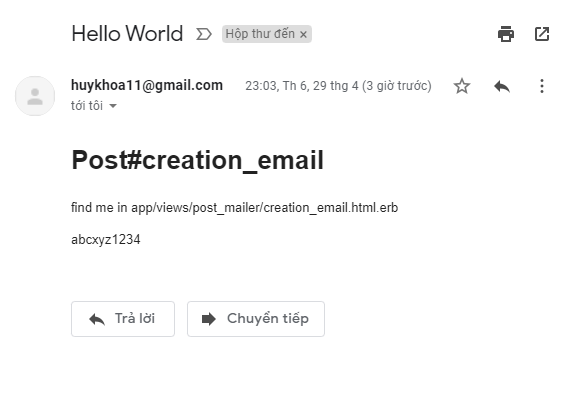
Sau khi tạo, vào mục thư đến của Gmail và kiểm tra kết quả nào!

Yes, It’s works! 😊😊
Tổng kết
Vây là chúng ta đã gửi mail thành công từ Rails App. Mọi người cùng đọc và góp ý nha ^^.
Nguồn tham khảo
1. Sách 現場で使える Ruby on Rails 5 速度実践ガイド 5.2 対応, tái bản lần thứ 6 ngày 27/12/2019, trang 299-305.
2. https://qiita.com/miriwo/items/06d7d69aff47fd02fbc1
Nguồn: viblo.asia
