Ở bài này thì mình cần thêm 1 VM cài Nginx để loadbalancer ở đây mình sẽ tạo thêm 1 VM ubuntu 22.04
| IP | Hostname | vCPU | RAM | DISK |
|---|---|---|---|---|
| 127.0.0.1 | Host | 8 core | 32G | SSD 500G |
| 192.168.56.2 | microk8s-master-1 | 1 core | 2G | 50G |
| 192.168.56.3 | microk8s-master-2 | 1 core | 2G | 50G |
| 192.168.56.4 | microk8s-master-3 | 1 core | 2G | 50G |
| 192.168.56.5 | microk8s-worker-1 | 1 core | 2G | 50G |
| 192.168.56.6 | microk8s-worker-2 | 1 core | 2G | 50G |
| 192.168.56.7 | microk8s-worker-3 | 1 core | 2G | 50G |
| 192.168.56.8 | microk8s-worker-4 | 1 core | 2G | 50G |
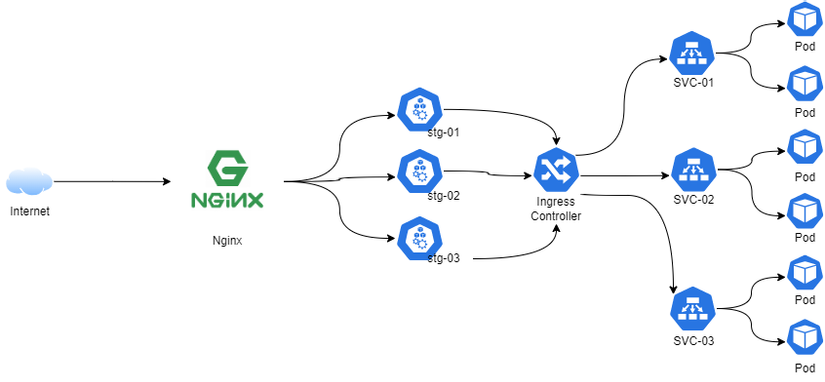
Ta cài đặt theo mô hình
Cài đặt Nginx trên Ubuntu 22.04
Bước 1 – Cài đặt Nginx
Cập nhật các gói cài đặt apt
sudo apt update
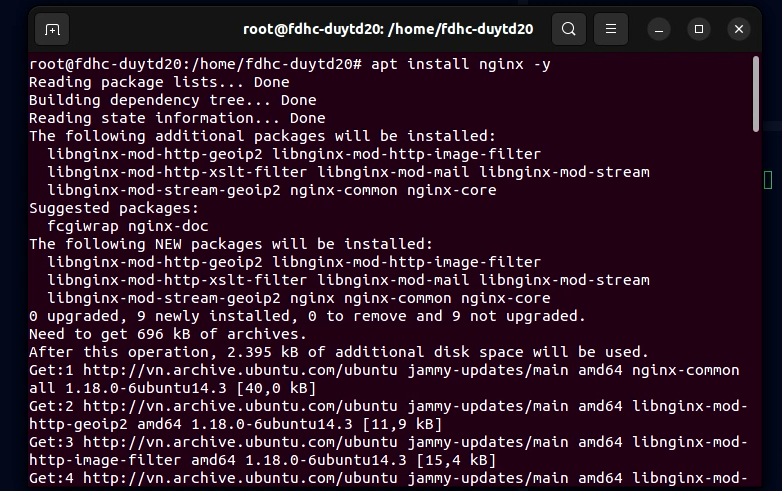
Cài đặt Nginx
sudo apt install nginx -y
Bước 2 – Cấp quyền HTTP Firewall
sudo ufw allow 'Nginx HTTP'
Bước 3 – Kiểm tra Máy chủ Web của bạn
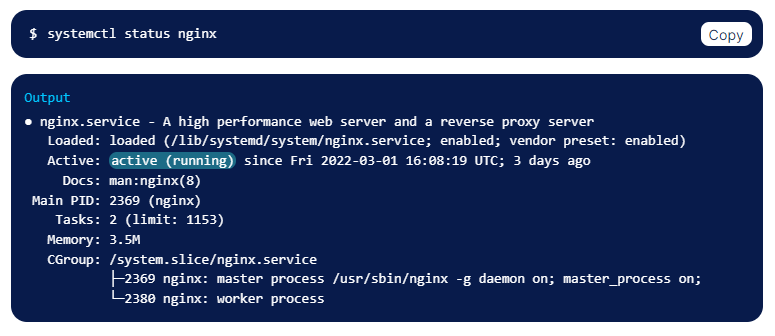
Kiểm tra service nginx có hoạt đông không?
Để tiện cho việc quản trị code trên máy master và test thì mình sẽ cài code-server lên máy microk8s-master-01
Để cài đặt các bạn chạy lệnh:
curl -fsSL https://code-server.dev/install.sh | sh

sudo systemctl enable --now code-server@$USER
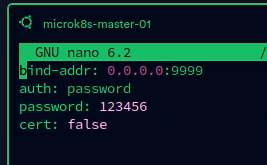
sau khi cài đặt xong thì mình vào thư mục config
nano ~/.config/code-server/config.yaml

bind-addr: 0.0.0.0:9999
auth: password
password: 123456
cert: false

sudo service code-server@$USER restart
Kích hoạt INGRESS
Để kích hoạt Inpress Controller của Microk8s chúng ta sử dụng lệnh:
microk8s enable ingress

Sau khi kích hoạt thành công chúng ta sẽ thử tạo tiệp ingress của dashboard
Tiệp: ingress-dashboard.yaml
apiVersion: networking.k8s.io/v1
kind: Ingress
metadata:
  name: https-ingress-dashboard
  namespace: kube-system
  annotations:
      kubernetes.io/ingress.class: public
      nginx.ingress.kubernetes.io/backend-protocol: "HTTPS"
spec:
  rules:
   - http:
      paths:
      - path: /
        pathType: Prefix
        backend:
          service:
            name: kubernetes-dashboard
            port:
              number: 443
Chạy lệnh microk8s kubectl apply -f ingress-dashboard.yaml
![]()
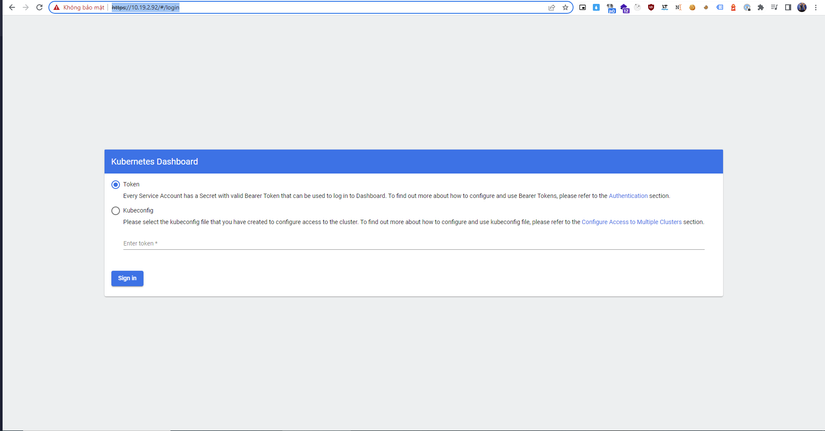
Khi thành công ta vào đường dẫn https://10.19.2.92/ để kiểm tra
Cấu hình nginx Reverse Proxy
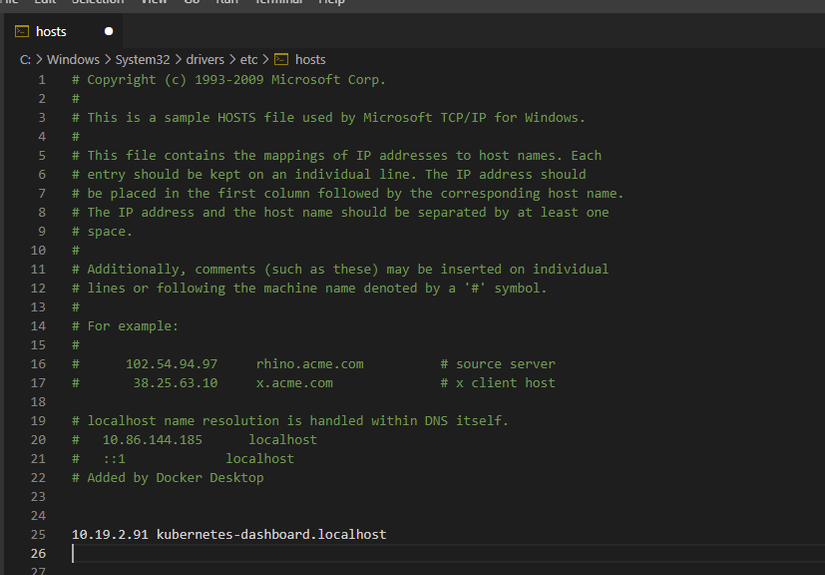
Bước 1: bạn vào file hosts để thêm 1 dòng ở cuối ở máy bạn đang sử dụng, ở đây mình sử dụng Ubuntu (Máy Host)
Windows Path: C:WindowsSystem32driversetchosts
MacOS & Linux Path: /etc/hosts
127.0.0.1 microk8s-dashboard.localhost
Bước 2: Cấu hình nginx
đi đến thư mục: /etc/nginx/sites-enabled
cd /etc/nginx/sites-enabled
tạo file microk8s-dashboard.localhost
sudo nano microk8s-dashboard.localhost
copy đoạn config thêm vào file microk8s-dashboard.localhost.conf
upstream host_mircok8s_worker {
    server 192.168.56.5;
    server 192.168.56.6;
    server 192.168.56.7;
    server 192.168.56.8;
}


server {

    listen 443 ssl http2;
    listen [::]:443 ssl http2;

    server_name microk8s-dashboard.localhost;

    ssl_certificate /etc/nginx/ssl/localhost.crt;
    ssl_certificate_key /etc/nginx/ssl/localhost.key;
    ssl_protocols TLSv1.2 TLSv1.3;
    ssl_prefer_server_ciphers on;

    location / {
        proxy_pass http://host_mircok8s_worker;
        proxy_redirect off;
        proxy_set_header Host $host;
        proxy_set_header X-Real-IP $remote_addr;
    }
}
Lưu lại và kiểm tra config xem đã chính xác chưa : sudo nginx -t
nginx: the configuration file /etc/nginx/nginx.conf syntax is ok
nginx: configuration file /etc/nginx/nginx.conf test is successful
Khởi động lại service:
sudo systemctl restart nginx
Cấu hình ingress-dashboard.yaml
Thêm dòng host: kubernetes-dashboard.localhost vào
apiVersion: networking.k8s.io/v1
kind: Ingress
metadata:
  name: https-ingress-dashboard
  namespace: kube-system
  annotations:
      kubernetes.io/ingress.class: public
      nginx.ingress.kubernetes.io/backend-protocol: "HTTPS"
spec:
  rules:
  - host: kubernetes-dashboard.localhost
    http:
      paths:
      - path: /
        pathType: Prefix
        backend:
          service:
            name: kubernetes-dashboard
            port:
              number: 443
Chạy lại config : microk8s kubectl apply -f ingress-dashboard.yaml
![]()
Nếu bạn thấy bài chia sẽ này hay xin hãy cho mình một like và đăng ký để ủng hộ mình nhé. Cảm ơn các bạn nhiều ♥️♥️♥️♥️
Các bài tham khảo:
Nguồn: viblo.asia
